Garage door openers enhance the convenience and security of your home. They save time, increase safety, and provide easy access to your garage. If you’re looking to upgrade your garage with a new opener, understanding how to install a garage door opener is crucial.

This guide will provide you with a straightforward, step-by-step process to ensure a smooth installation. We’ll cover all the necessary steps, from gathering tools and materials to testing the installed opener for functionality. We aim to equip you with the knowledge and confidence needed to complete the task efficiently and effectively.
We’ll share valuable tips to save you time and effort. These tips come from experts who have installed countless garage door openers and know the common pitfalls to avoid. Whether you’re a seasoned DIY enthusiast or a beginner tackling your first project, our expert advice will help you get the job done right.
By the end of this guide, you’ll understand how to install a garage door opener, ensuring that your garage is both more convenient and secure.
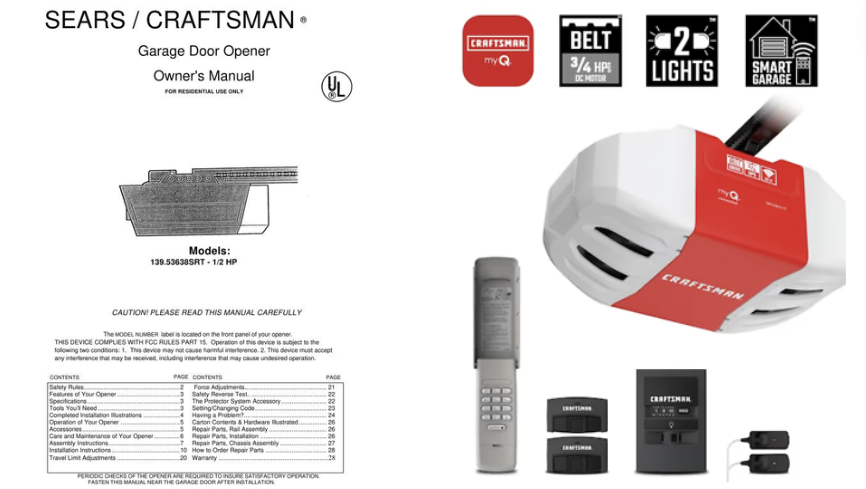
Choosing the Right Garage Door Opener
When deciding how to install a garage door opener, selecting the right type of opener is your first crucial step. Here’s a quick overview of the main types of garage door openers available:
- Chain Drive Openers: These are the most common and affordable. They use a metal chain to lift and lower the garage door. While durable, they can be noisy, making them less suitable for garages attached to living spaces.
- Belt Drive Openers: These use a belt instead of a chain, resulting in quieter operation. They are ideal for attached garages but typically cost more than chain drive openers.
- Screw Drive Openers: These openers use a threaded steel rod to move the door. They have fewer moving parts, which means less maintenance, but they can be noisier than belt drives and may not perform well in extreme temperatures.
Factors to Consider When Choosing an Opener
When choosing a garage door opener, consider the following factors:
- Power: The motor’s power is crucial, especially for heavy doors. Residential openers typically come in 1/2 HP, 3/4 HP, and 1 HP models. A higher horsepower motor ensures smoother and more reliable operation for heavier doors.
- Noise Level: If noise is a concern, opt for a belt drive or a wall-mounted opener. Chain drive openers, while effective, can be quite loud.
- Price: Determine your budget. Chain drive openers are usually the most affordable, followed by screw drives and then belt drives. However, long-term maintenance and replacement costs should be considered.
- Smart Features: Modern openers come with smart features like Wi-Fi connectivity, allowing you to control your garage door with a smartphone app. These can add convenience but may come at a higher price.
Where to Purchase High-Quality Openers
When purchasing a garage door opener, consider buying from reputable retailers. Home improvement stores like Home Depot and Lowe’s offer a wide selection, and online platforms such as Amazon provide numerous options with customer reviews. Look for products with good warranties and strong customer feedback. Brands like Chamberlain, LiftMaster, and Genie are well-known for their reliability and performance.

When choosing how to install a garage door opener, ensure that the product meets your specific needs and preferences. High-quality openers will save you time, reduce maintenance, and enhance your overall home experience.
Pre-Installation Checklist
Before starting the process of how to install a garage door opener, ensure you have all the necessary tools and materials and understand the safety precautions. Following a pre-installation checklist will help you complete the job efficiently and safely.
Necessary Tools and Materials
- Garage Door Opener Kit: Ensure it includes the motor unit, rail, belt or chain, brackets, safety sensors, and remote controls.
- Tools:
- Power drill with bits
- Screwdrivers (Phillips and flat-head)
- Adjustable wrench
- Pliers
- Hammer
- Tape measure
- Level
- Stepladder
- Socket and ratchet set
- Materials:
- Mounting hardware (included in the kit)
- Wood blocks or shims
- Electrical tape
- Safety glasses
- Work gloves
Safety Precautions
- Disconnect Power: Before starting, ensure the power to the garage is turned off to avoid any electrical accidents.
- Wear Protective Gear: Always wear safety glasses and gloves to protect yourself from debris and sharp edges.
- Use a Stable Ladder: Ensure your stepladder is on a stable surface and in good condition to avoid falls.
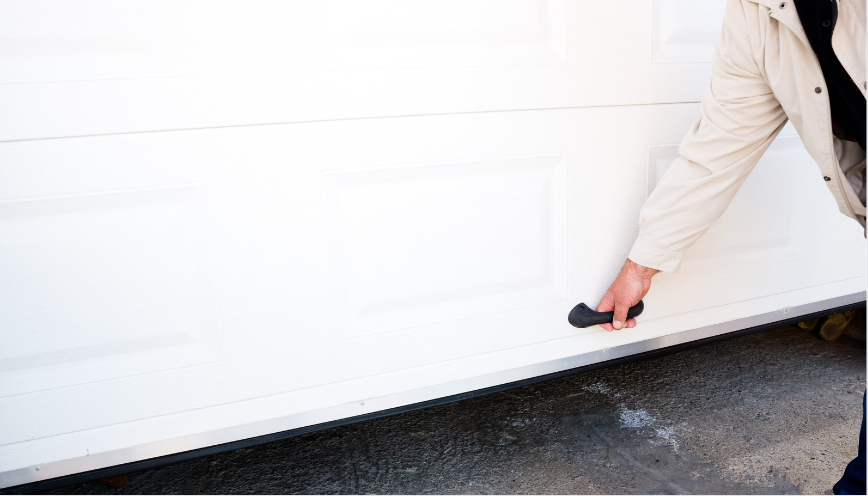
- Check Door Balance: Make sure the garage door is properly balanced. An unbalanced door can be dangerous and affect the operation of the opener.
- Follow Manufacturer’s Instructions: Always adhere to the specific safety guidelines provided by the manufacturer.
Importance of Reading the Manufacturer’s Manual
Before you begin the installation process, thoroughly read and understand the manufacturer’s manual. Each garage door opener model may have unique components and specific installation steps. The manual will provide detailed instructions on assembly, wiring, and setup. Familiarizing yourself with these details will help you avoid mistakes and ensure a smooth installation.
By preparing with the right tools, observing safety precautions, and understanding the manufacturer’s manual, you’ll be well-equipped to install your garage door opener efficiently and safely.
Step-by-Step Installation Guide
Step 1: Assemble the Opener
- Unpack the Kit: Lay out all the components from the garage door opener kit.
- Assemble the Rail: Connect the rail sections as directed in the manufacturer’s manual. Ensure the rail is straight and secure.
- Attach the Trolley: Slide the trolley onto the rail. This component moves along the rail to open and close the door.
- Mount the Motor Unit: Attach the motor unit to the rail, following the instructions. Secure it tightly to avoid any movement during operation.
- Install the Belt or Chain: Attach the belt or chain to the trolley and motor unit, depending on your model. Make sure it is properly tensioned according to the manual.
Step 2: Mounting the Opener
- Position the Rail: Lift the assembled rail and motor unit into position. Use a stepladder for stability and assistance if needed.
- Install the Header Bracket: Secure the header bracket to the wall above the garage door. This bracket holds the rail in place.
- Attach the Rail to the Header Bracket: Secure the end of the rail to the header bracket with the provided hardware.
- Mount the Motor Unit: Use the provided brackets to attach the motor unit to the ceiling. Ensure it is level and securely fastened. Use wood blocks or shims if necessary to achieve a stable mount.
Step 3: Connecting the Opener
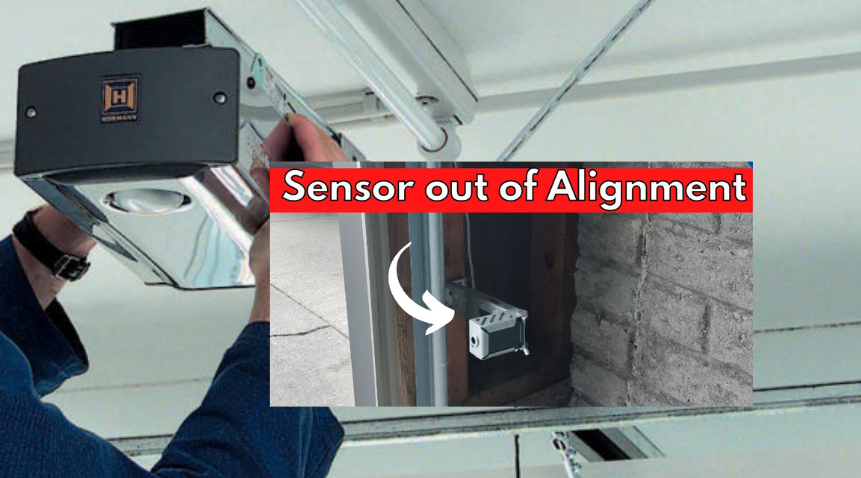
- Install the Safety Sensors: Place the safety sensors on each side of the garage door, about 6 inches above the floor. Ensure they are aligned and connected to the opener with the included wiring.
- Connect the Power: Plug the opener into a nearby electrical outlet. If there is no outlet, you may need to install one or hire an electrician.
- Program the Remote Controls: Follow the manufacturer’s instructions to program the remote controls and wall-mounted keypad (if included).
- Test the Opener: Turn on the power and test the opener. Place an object in the door’s path to ensure the door opens and closes smoothly and that the safety sensors work correctly.
Following these steps on how to install a garage door opener, you’ll ensure that the opener is correctly assembled, mounted, and connected. This will provide reliable and safe operation for your garage door.
Testing and Troubleshooting
How to Test If the Garage Door Opener Is Working Properly
- Initial Test:
- Power On: Ensure the garage door opener is plugged in and the power source is on.
- Remote Control: Use the remote control to open and close the garage door. The door should move smoothly without any jerking or unusual noises.
- Wall Button: Test the wall-mounted control by pressing the button to open and close the door.
- Safety Sensors:
- Alignment: Ensure the safety sensors are properly aligned, and the indicator lights are on.
- Obstruction Test: Place an object in the path of the door. The door should stop and reverse direction when it detects the object.
- Manual Release:
- Functionality: Pull the manual release handle to disengage the opener. Manually open and close the door to ensure it moves freely. Re-engage the opener to return to automatic operation.
- Balance Check:
- Door Balance: Disconnect the opener and manually lift the door halfway. If it stays in place, the door is balanced. If it moves, you may need to adjust the springs.
Common Issues That Might Arise During Installation and How to Troubleshoot Them
- Door Doesn’t Open or Close:
- Power Supply: Check if the opener is properly plugged in and the outlet is functional.
- Remote Batteries: Replace the batteries in the remote control.
- Safety Sensors: Ensure the sensors are aligned and not obstructed.
- Opener Makes Noise But Door Doesn’t Move:
- Belt/Chain: Check if the belt or chain is properly attached and tensioned.
- Trolley: Ensure the trolley is engaged with the rail and moving correctly.
- Door Reverses Before Hitting the Floor:
- Sensitivity Adjustment: Adjust the downforce sensitivity on the opener as per the manual’s instructions.
- Obstructions: Check for any obstacles on the ground that might trigger the reversal.
- Remote Control Not Working:
- Programming: Reprogram the remote control according to the manufacturer’s instructions.
- Range: Ensure you are within the operational range of the opener.
- Door Doesn’t Fully Open or Close:
- Limit Settings: Adjust the open and close limit settings on the opener. These settings determine how far the door travels.
- Track Alignment: Check if the door tracks are aligned and free of obstructions.
With these testing and troubleshooting steps, you can ensure that your garage door opener is functioning correctly after installation. If you encounter persistent issues, consult the manufacturer’s manual for detailed troubleshooting tips or contact customer support for assistance. Understanding how to install a garage door opener includes being prepared to address these common problems efficiently.
Maintenance Tips
Routine Maintenance Tasks
- Lubrication:
- Moving Parts: Regularly lubricate the chain, screw, and other moving parts with a recommended garage door lubricant. This helps reduce friction and wear.
- Hinges and Rollers: Apply lubricant to the door hinges, rollers, and tracks to ensure smooth operation.
- Tightening Hardware:
- Bolts and Screws: Periodically check and tighten all bolts, screws, and brackets. Vibration from the opener can loosen these over time.
- Cleaning:
- Tracks and Sensors: Keep the tracks and safety sensors clean from dirt and debris. This ensures the door moves smoothly and the sensors function correctly.
- Opener Unit: Wipe down the opener unit to prevent dust buildup, which can interfere with its operation.
- Testing Safety Features:
- Auto-Reverse Mechanism: Test the auto-reverse feature by placing an object in the door’s path. The door should stop and reverse when it contacts the object.
- Manual Release: Regularly check the manual release to ensure you can operate the door manually in case of a power outage.
Importance of Regular Checks and Balance Tests
- Balance Tests:
- Door Balance: Disconnect the opener and lift the door halfway. If it stays in place, the door is balanced. If it moves up or down, it may need spring adjustment. An unbalanced door puts extra strain on the opener and can lead to premature failure.
- Visual Inspections:
- Hardware and Cables: Inspect cables, springs, and mounting hardware for signs of wear or damage. Replace any worn or damaged parts immediately to prevent failure.
- Sensor Alignment:
- Safety Sensors: Check that the safety sensors are properly aligned and free from obstruction. Misaligned sensors can prevent the door from closing properly.
- Opener Testing:
- Remote Controls and Keypads: Test remote controls and keypads to ensure they are functioning correctly. Replace batteries as needed.
Performing these maintenance tasks regularly can significantly prolong the life of your garage door opener and ensure it operates smoothly. Understanding how to install a garage door opener includes knowing how to maintain it properly to avoid costly repairs and ensure safety. Regular maintenance checks and balance tests are essential to keep your garage door system in top working condition.
Frequently Asked Questions
Can I install a garage door opener myself?
Yes, you can install a garage door opener yourself if you have basic DIY skills and the necessary tools. To ensure proper installation, follow a detailed guide on how to install garage door openers. Always adhere to safety precautions and refer to the manufacturer’s instructions.
How to set up a garage door opener?
To set up a garage door opener, follow these steps:
- Assemble the opener by connecting the rail, trolley, and motor unit.
- Mount the opener to the ceiling and attach the rail to the header bracket above the garage door.
- Connect the opener to the door and install the safety sensors.
- Plug in the opener, program the remotes, and test the system to ensure it works correctly.
What is the easiest garage door opener to install?
The easiest garage door opener to install is typically a belt drive opener due to its straightforward assembly and quieter operation. Many models come with clear instructions and fewer components, making the installation process more manageable for DIY enthusiasts.
How do I prepare my garage door opener for installation?
To prepare for installation:
- Gather all necessary tools and materials.
- Ensure the garage door is balanced and in good working condition.
- Read and understand the manufacturer’s manual.
- Make sure you have a stable ladder and all parts from the garage door opener kit.
- Disconnect any existing garage door opener system and clear the area.
How do you install an automatic garage door?
To install an automatic garage door:
- Assemble the main components of the garage door opener.
- Mount the opener securely to the ceiling and attach the rail to the header bracket.
- Connect the opener to the door and install the safety sensors.
- Connect the opener to the power source and program the remote controls.
- Test the system to ensure the door opens and closes properly and that all safety features are functional.
Understanding how to install garage door opener involves following these steps and ensuring that each component is properly set up for optimal performance.
Conclusion
Installing a garage door opener correctly is essential for enhancing the functionality and security of your home. Knowing how to install a garage door opener ensures smooth operation, prolongs the life of your system, and prevents unnecessary issues. Proper installation and regular maintenance help keep your garage door reliable and safe.
For top-quality garage door services, consider Garage Door Springs Specialists. They are experts in garage door systems, with a special focus on garage door springs, ensuring that all components work together seamlessly. Professional installation services provided by Garage Door Springs Specialists guarantee that your garage door opener is installed correctly and functions optimally.
Visit Garage Door Springs Specialists for more information and services to meet all your garage door needs. Their expertise and commitment to quality make them a trusted choice for ensuring the longevity and reliability of your garage door.
End Note
Introducing Garage Door Springs Specialists, your trusted source for top-quality garage door services. We specialize in garage door springs and are dedicated to providing the best service to homeowners and businesses in our community. Our skilled and experienced technicians ensure fast, reliable service to keep your garage door operating smoothly and safely.
We understand the importance of a functional garage door for your safety and convenience. We offer a range of services, including routine check-ups, repairs, and full spring replacements, all aimed at enhancing your garage door’s safety and functionality. Our goal is to fix your problems and ensure your garage door system works flawlessly for years.
Our blog is a valuable resource for garage door maintenance, offering maintenance tips and advice. Follow us on Facebook for the latest updates and tips to keep your garage door in top condition.
Join the numerous satisfied customers who trust Garage Door Springs Specialists for their garage door needs. Visit our Contact page today to schedule your repair or maintenance appointment. With Garage Door Springs Specialists, your garage door safety and efficiency are our top priorities. Reach out now and take the first step towards a secure and hassle-free garage experience.


